

If you wish to create an VR Interactive you have to first upload a VR Video to app.smartvrlab.nl. Here’s an article to see how you do this.
Why should we make VR Interactive Videos?
VR Interactives are incredibly handy to use if you want to create the most immersive type of training, or experience. Because a VR Interactive is in Virtual Reality it will require a VR headset, but it might well be worth it, depending on what you need.
Because VR is so immersive you can for example, see how someone is affected by certain situations. Or why they would handle it in that way and not in another. This allows for conversations and insight on a person.
Steps to Create a VR Interactive
Step 1 – Open VR Interactives
You uploaded a VR Video and can now make it a VR Interactive. When you log into the Smart VR Lab app, you can navigate to the left sidebar and click on VR Interactives.
Step 2 – Add VR Interactive
Press the purple button on the top left corner to add a VR Interactive.
![]()
When you click on it you can see a whole lot of text, but don’t worry it’s quite easy to understand.
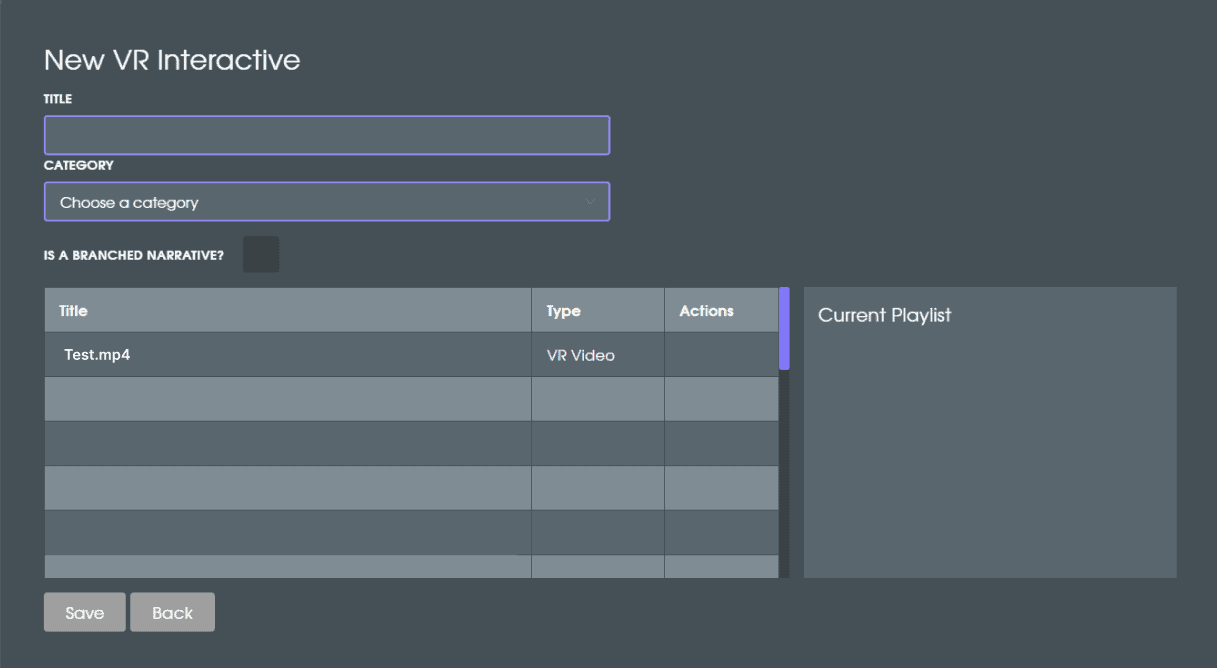
First of all give your Interactive a title, then give it a category. If you’re curious on how you can make a category click here to go to the article.
Step 3 – Choose Branched Narrative or Linear
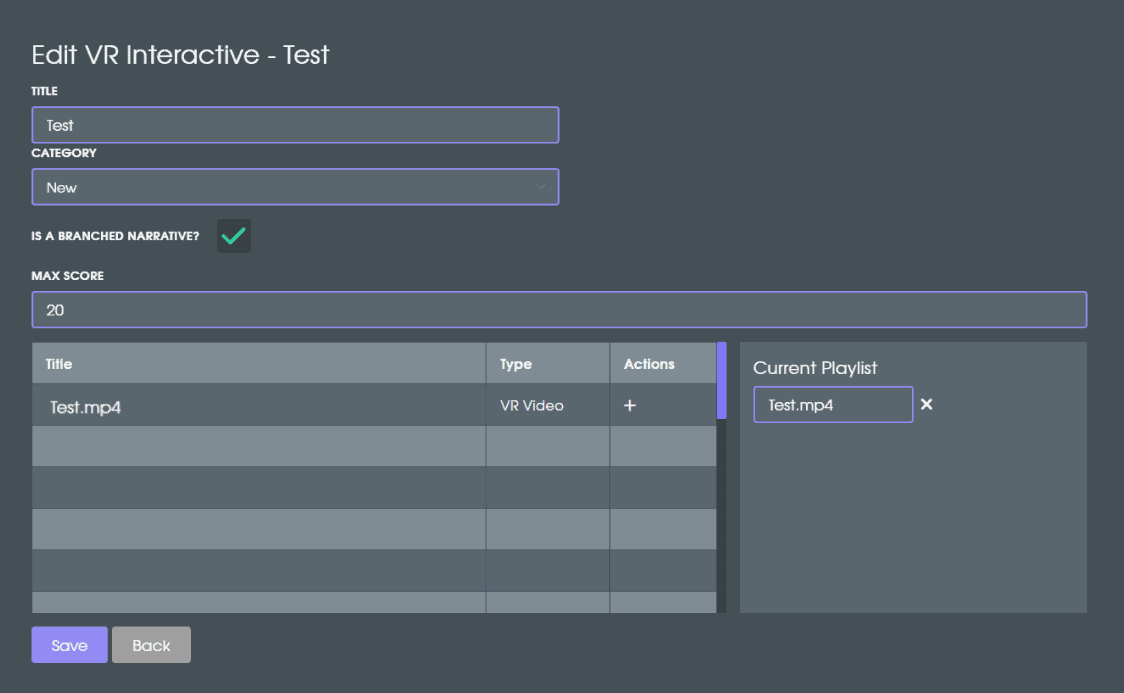
After choosing a category it is possible to set your interactive as a branched narrative. If you choose this option you’ll have to assign a number of points for your users to collect.
Note: You’re always able change the amount of points later by going to the edit icon.
Step 4 – Add your VR Video’s
Select your VR Video by clicking on the + icon underneath the table “Actions”. The video will appear on the right, underneath “Current Playlist”. You can also rename your “scenes” here, which is very handy when you are creating a Branched Narrative and want to use different parts from the same video.
Step 5 – Save and Start
Go ahead and save your Interactive. It’ll be shown in the VR Interactive tab.
Step 6 – Open the Interactive Editor
If you click on the little pencil icon, it will take you to the Interactive Editor.
 Here you can see a preview of your VR video, your playlist and the timeline. You can play it, put on fullscreen and adjust the volume.
Step 7 – Add Question
Beneath the preview of your video, a timeline is shown with a green dot on top of it. You’re able to move this green dot over the timeline and click on the Add Question button to add a question to that time-point. You can also change the position of a question, by selecting it, clicking in the timeline where you want the question to be and clicking the Update Timecode button.

Step 8 – Question Types
There are 3 question types: Multiple Choice, this means that the viewer can select one answer. Checkbox, the viewer can select multiple answers and Info, where you can create an info panel with text, with feedback for instance.
There is also the Timer option to limit the time the viewer has to answer the question.
There is also the option to add points (Positive or Negative) to the answers, by changing the point value in the last column. You are able to then save it and see your first question added to the timeline.
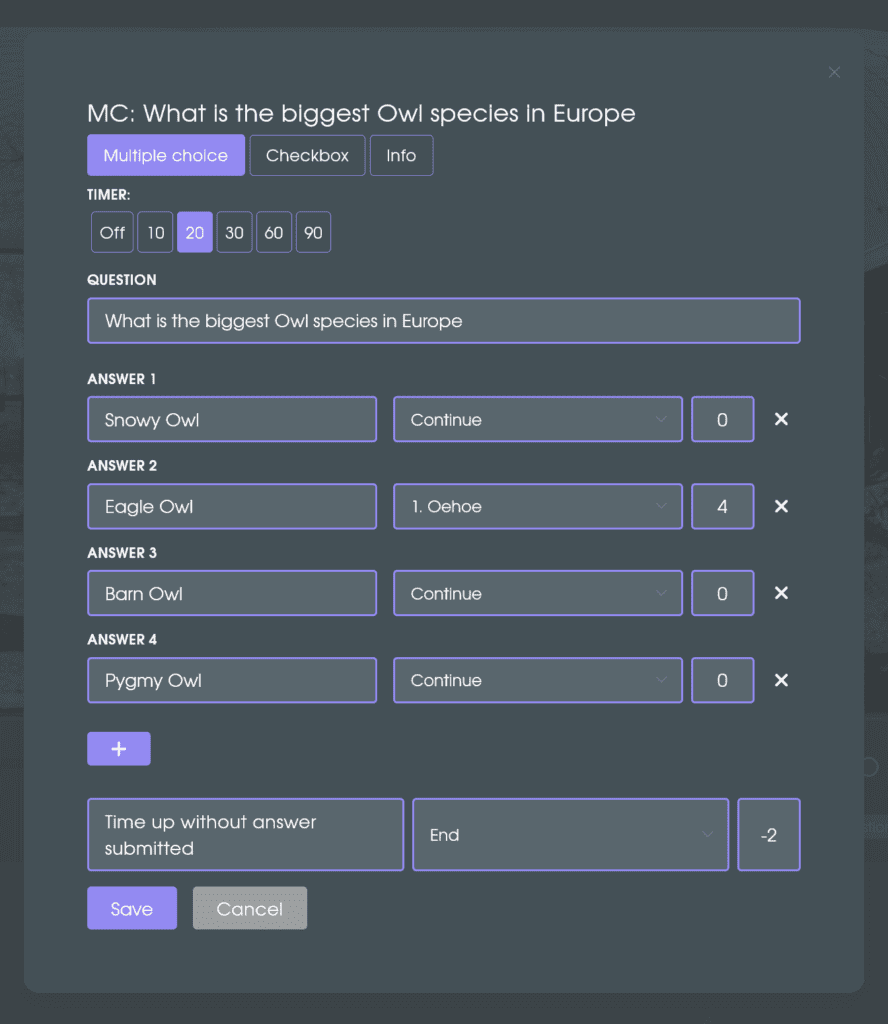
This is an example of a Branched Narrative Multiple Choice Question, where you can see how you can select bring the viewer to different scenes after an answer is chosen or not.