

If you want to create an Interactive Video you need to upload a Video to app.smartvrlab.nl first. If you haven’t done this before here’s an article on how to do this.
What is the difference between VR Interactive and Interactive and why should you use one?
Predictably the main difference between VR Interactive videos and Interactive videos are the fact that VR Interactive videos are made using VR Videos. In contrast, Interactive videos are made using a normal camera.
Then why should you choose one or the other? Interactive Videos are handy if you’d like to make the videos playable on a PC. These can for example, be used for courses in supermarkets on how you’d react in certain situations. They’re easily accessible and don’t require a VR headset.
Making an Interactive Video
Step 1 – Navigate to Interactive Videos
You uploaded a Video to the website and can now make it an Interactive Video. Navigate to the left sidebar and click on Interactive Videos under E-learning.
Step 2 – Upload an Interactive Video
Press the purple button on the top left corner to add an Interactive Video.
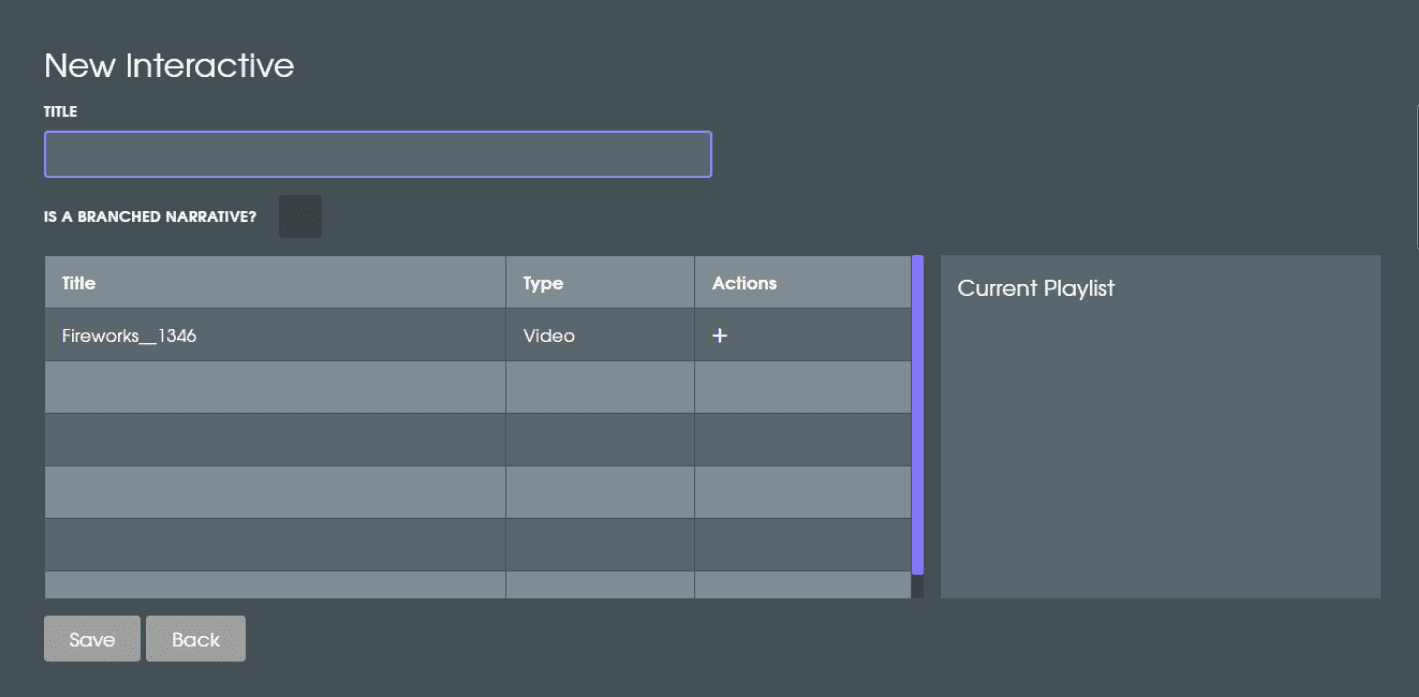
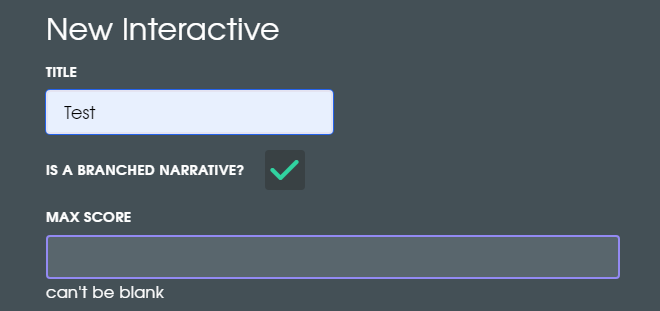
First of all give your Interactive a title. Is it a branched narrative, or would you like to make it a linear one? If you want to know more about a branched narrative you can visit this article here.
Step 3 – Score
For choosing a Branched Narrative you should keep in mind that an maximum score will have to be filled in, as it can’t be blank.
Note: You’re always able change the amount of points later by going to the edit icon
Step 4 – Select Video
Select your Video by clicking on the + icon underneath the table “Actions”.
Step 5 – Create an Interactive Video
Go ahead and save your Interactive Video. It’ll be shown in the Interactive Videos tab.
Step 6 – Editor Mode
If you click on the little pencil icon, you head into the editor mode.
![]()
Here you can edit your video. There are some options on the top right. From left to right; Copy the video link, watch the video, change the settings of the video and go back to the Interactive Videos tab.
Step 7 – Add Question
Beneath the preview of your video, a timeline is shown with a green dot on top of it. You’re able to move this green dot over the timeline and click on the Add Question button to add a question to that time-point. If you misplaced the question, by selecting it, you can change slide it across the timeline and press Update Timecode to update the location of your question.

Step 8 – Question Types
There are 3 question types: Multiple Choice, this option allows you to place multiple answers to a question where the viewer can select one answer. A Checkbox, the viewer can select multiple answers. Info, where you’re able to create an info panel with text, with feedback for example.
Below that there’s also the option of adding a timer to your questions to put a bit more pressure on the user.
There is also the option to add points and/or penalties to the answers, by changing the point value in the last column. You are able to then save it and see your first question added to the timeline.
You can also find the questions on the right side underneath “Playlist”.
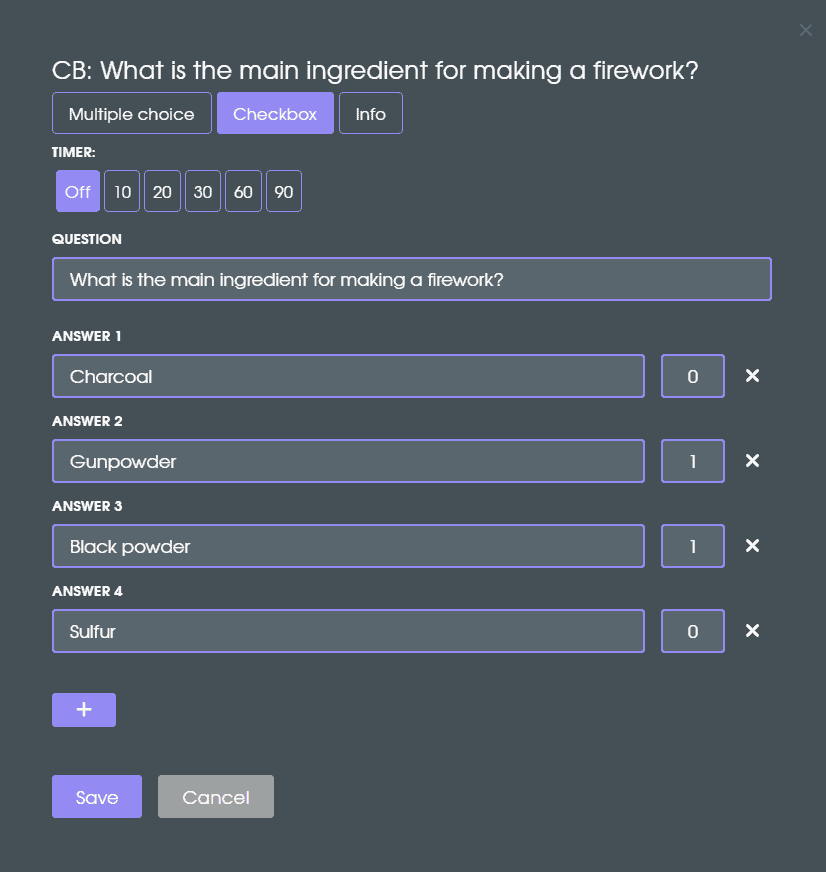
This is an example of a Checkbox Question. You can see that you can select more than one answer and the amount of points the viewer will receive.